

00591 – Seat Belt Swap; Driver (E24): Resistance too Excessive
You most likely have this situation or one thing comparable. Changing the seat belt latch will price about $300. Nobody desires to pay that.
Complete time: 1 hr to 2 hrs (relying in your endurance and soldering abilities)
Disclaimer: I am not answerable for something you screw up. I like to recommend that you know the way to solder, work with small issues/ tight areas/ and have a considerable amount of endurance.
Instruments:
Rag (To guard your inside of dripping solder and glue)
Shrink Wrap tubing (Could be had from Radio Shack)
Needle Nostril Pliers
Wire Cutters
Sharp Knife
Wire Strippers (Be capable of strip 22 AWG wire)
Soldering Iron
Rope/Twine
Black Electrical Tape
Small Flathead Screwdriver
5 Rubber Bands
Glue (You should utilize tremendous glue as I did on this writeup however epoxy can be a a lot stronger bond)

DISCONNECT YOUR BATTERY BEFORE YOU START.
Messing with the airbag system with the battery linked may spell catastrophe.
Begin by shifting your seat all the way in which ahead and tie it near the steering wheel so it does not transfer again in any respect (when you have a 2 door).

Then, utilizing the small screwdriver, insert it within the backside of the buckle and pry the underside open. You’re primarily breaking it open (It’s meant to interrupt when taken aside). After you have the underside cracked, seize it and pull it as much as break off the highest portion. (Mine already had that piece damaged off beforehand, you will get it off with out inflicting main harm)
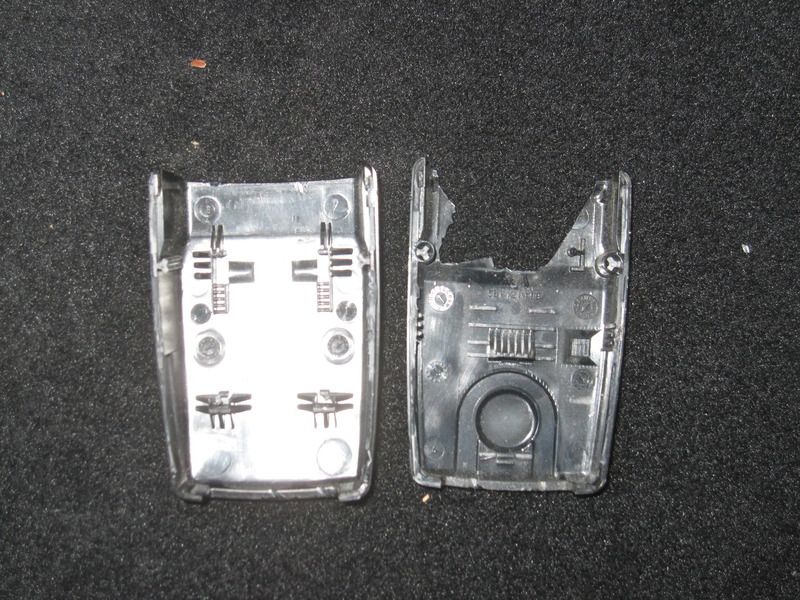
These 2 items fell out of mine and I don’t know the place they got here from. Nevertheless, my buckle nonetheless features wonderful. Possibly you may determine it out.

Tie your latch right down to your seat mount to get it out of the way in which.

Reduce the big warmth shrink and peel it down to show the internal warmth shrink.

Now you may see the latch meeting. Pull off the switches by pulling outward on 1 facet to launch it from the notch. Then do the identical to the opposite facet.

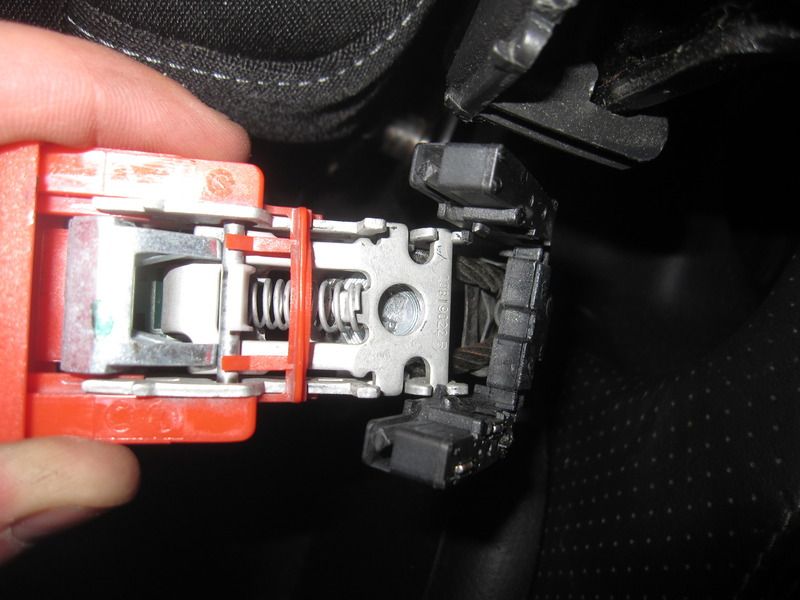
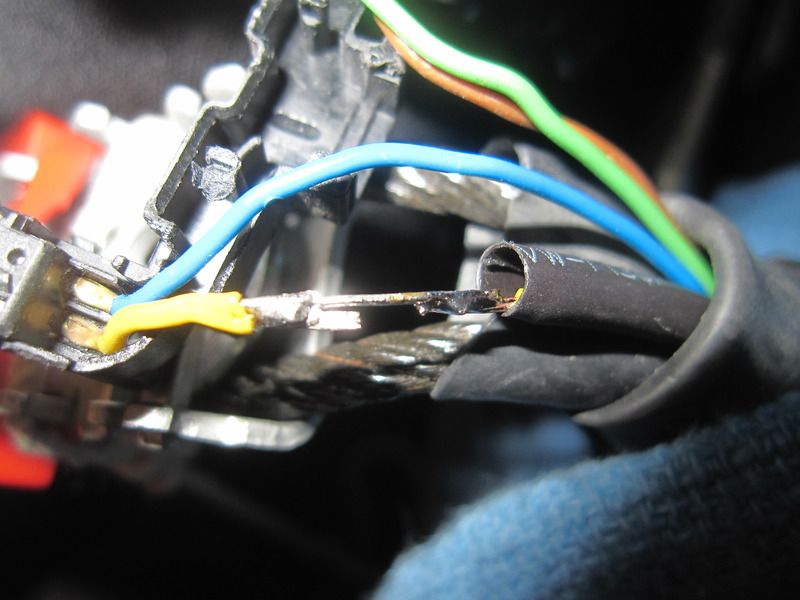
Now you can see the place the wire has damaged from the latch shifting round a lot.

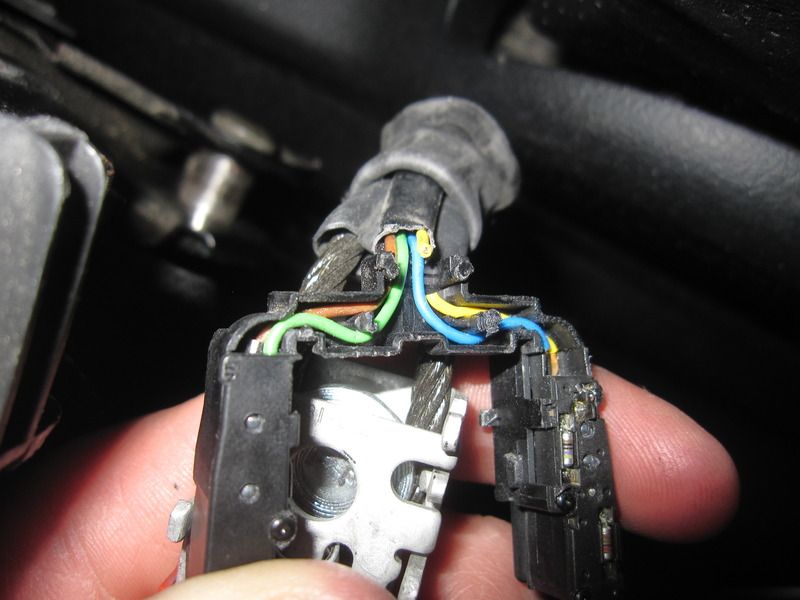
Now lower and peel again the warmth shrink tubing round all 4 wires to provide your self some room. Pull out all 4 wires from the latch meeting and strip each ends of no matter wire is damaged. I’d maintain the wire with the needle nostril after which use the strippers so you do not pull the wire out of the change (that is not enjoyable to repair)

Now tin each ends. (If you do not know the way to tin, all you’re doing is making use of solder to the copper strands so it now turns into a strong piece so it’s simpler to work with and makes it a lot simpler to solder two issues collectively.)

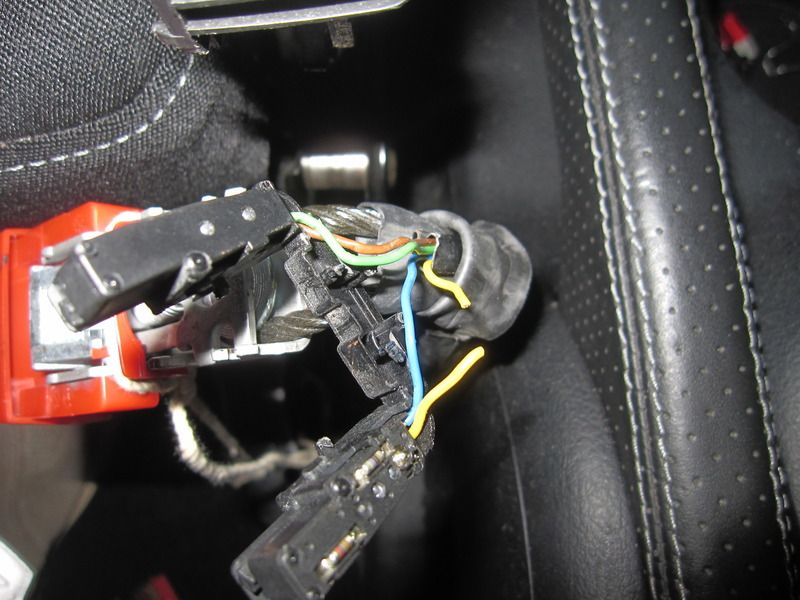
For the reason that wire was lower, we should bridge the hole and prolong it only a bit. I’m utilizing a chunk of strong core wire to do the job. It’s about half an inch lengthy or so. I’m actually solely extending the wires by about 1/eighth of an inch. Be sure to tin the complete bridge piece as nicely.

Now solder it on, be sure to do not warmth the wires up an excessive amount of like I did, you’ll begin to birdcage the wires and soften the insulation. Bear in mind, the larger the blob is definitely not a greater job. You need even, constant, and max protection in your solder joints.

Now remember to place your heatshrink tubing on!
Now shrink up that tubing and the place the wires used to go, there’s a little plastic pedestal in the way in which. Use your small screwdriver and twist it out.


Stuff all of the wires again in there, apply some electrical tape to the small warmth shrink tubing you chop that holds the 4 wires.

Roll up the big warmth shrink tubing and apply a chunk {of electrical} tape to the bottom to maintain it closed.

Now comes the enjoyable half. Gluing the buckle halves again collectively. Apply a coat of glue to the complete inside edge. If you happen to maintain the items collectively with out glue on it, you’ll discover there’s a small hole in between them. You do not need any glue in there or any to seep in there so preserve a watch out. When you get all of it glued and positioned again collectively, get 4-5 rubber bands and strap all of it collectively.
Clear your airbag code and you’ll be all set!

